


Close
There’s one thing you need to know about makeup for photo shoots, the camera never captures makeup and color in quite the same as in real life. So we have put together a few important makeup tips you should be aware of. Not applying makeup correctly (for photography) will make your photos look flat and uninteresting. You want to make your makeup as striking as possible.
First, you’ll have to apply more makeup for photo shoots than you are probably comfortable with. Even if you usually have subtle or no makeup at all you’ll need to really exaggerate the makeup you’re applying, trust me it will not show up as strong through the camera. Sorry au naturale ladies, just wearing a bit of mascara and lip color isn’t going to be enough for photos.
Don’t be afraid to use bold colours, especially bold lip colours. This doesn’t mean you have to use heavy brown eye shadow or fire engine red for your lips. Just make sure that the makeup is a little more intense than you typically would.
All products should be matte to avoid adding shine to you face. The possible exception is, of course, lip colour – a bit of shine on the lips can make your lips look fuller and more attractive in a photograph.
Tip: Try to avoid using products with SPF for photo shoots, the ingredients can often make the face look shinier in photos.
Most professional foundation or concealers won’t cover every pore on your face, and this is a good thing. You want to keep your freckles and birthmarks visible so that your portraits look natural. Your makeup should enhance your features, not remove them entirely.
Skin Prep
I’m sure you all know this, but it’s worth repeating: always wash and moisturize your face first. Not only is it good for your skin and your complexion, but it’s best to start on a fresh canvas.
Coat your face with a thin layer of moisturizer and primer. Not only does it help ensure your makeup stays in place, it also lessens the appearance of your makeup and fine lines, making your skin appear younger and more natural. Target the areas under your eyes, nose, forehead and cheekbones
Foundation and Powders
When it comes to foundation, you don’t want to use just any product you happen to have on hand. In fact, when shopping around for the perfect foundation for photos, you’ll want to make sure you select the closest possible shade to your skin tone — anything lighter or darker will look awkward and more obvious in photos. If you choose to pair your foundation with a powder, avoid HD powders — while they look nice in-person, your skin will appear to have white patches in photos. Instead, go for colored loose powder or a regular powder compact.
Don’t worry about trying to get full coverage — the camera will wash out most of your blemishes. Cakey foundation is easy to spot, especially in photos. I know you want to look perfect, but try to avoid using too much – you want to keep the texture of your skin. Instead of trying to make your skin look flawless, focus on making sure it looks natural.
Don’t be afraid to use a lot more powder than usual. Powder will create a matte effect and make every part of your face look even, which is exactly what you want. Setting or finishing powder is routinely used in fashion and beauty photography to reduce shimmer and make the skin look matte. Professional makeup artists will reapply powder every 10–20 minutes to prevent shiny skin. Bring yours and apply extra powder regularly.
Tip: If you have red skin, use a green tinted primer or concealer to counteract the red.
A healthy and natural glow always complements your pictures, so you can use a small amount of highlighter to enhance your cheekbones, the tip of your nose, and your cupid’s bow. Shimmery makeup doesn’t always look great in pictures. Because of the bright light around you, shimmery makeup will reflect and create hot spots. Again, don’t go overboard with the highlighter, shimmery lipstick, and glitter eye shadow. Keep your face as matte as possible so that every part of your makeup complements your face. For party makeup, shimmer can look great, but for photography, use a matte finish.
Posing, changing outfits, and even talking with the photographer will inevitably make you sweat a little. Everyday sweat like this might not be visible in person, but it can be obvious in pictures.
A small amount of translucent powder is enough to avoid this.
Oily skin
The best way to control oily skin is a blotter sheet. If this is not enough, mattifying gel (cream) is easy to apply and works well with the skin of all types and colours.
Another recommendation is colourless translucent powder, such as L’Oreal Bare Naturale mattifying mineral finish powder, which works well for light skin, but not on darker skin.
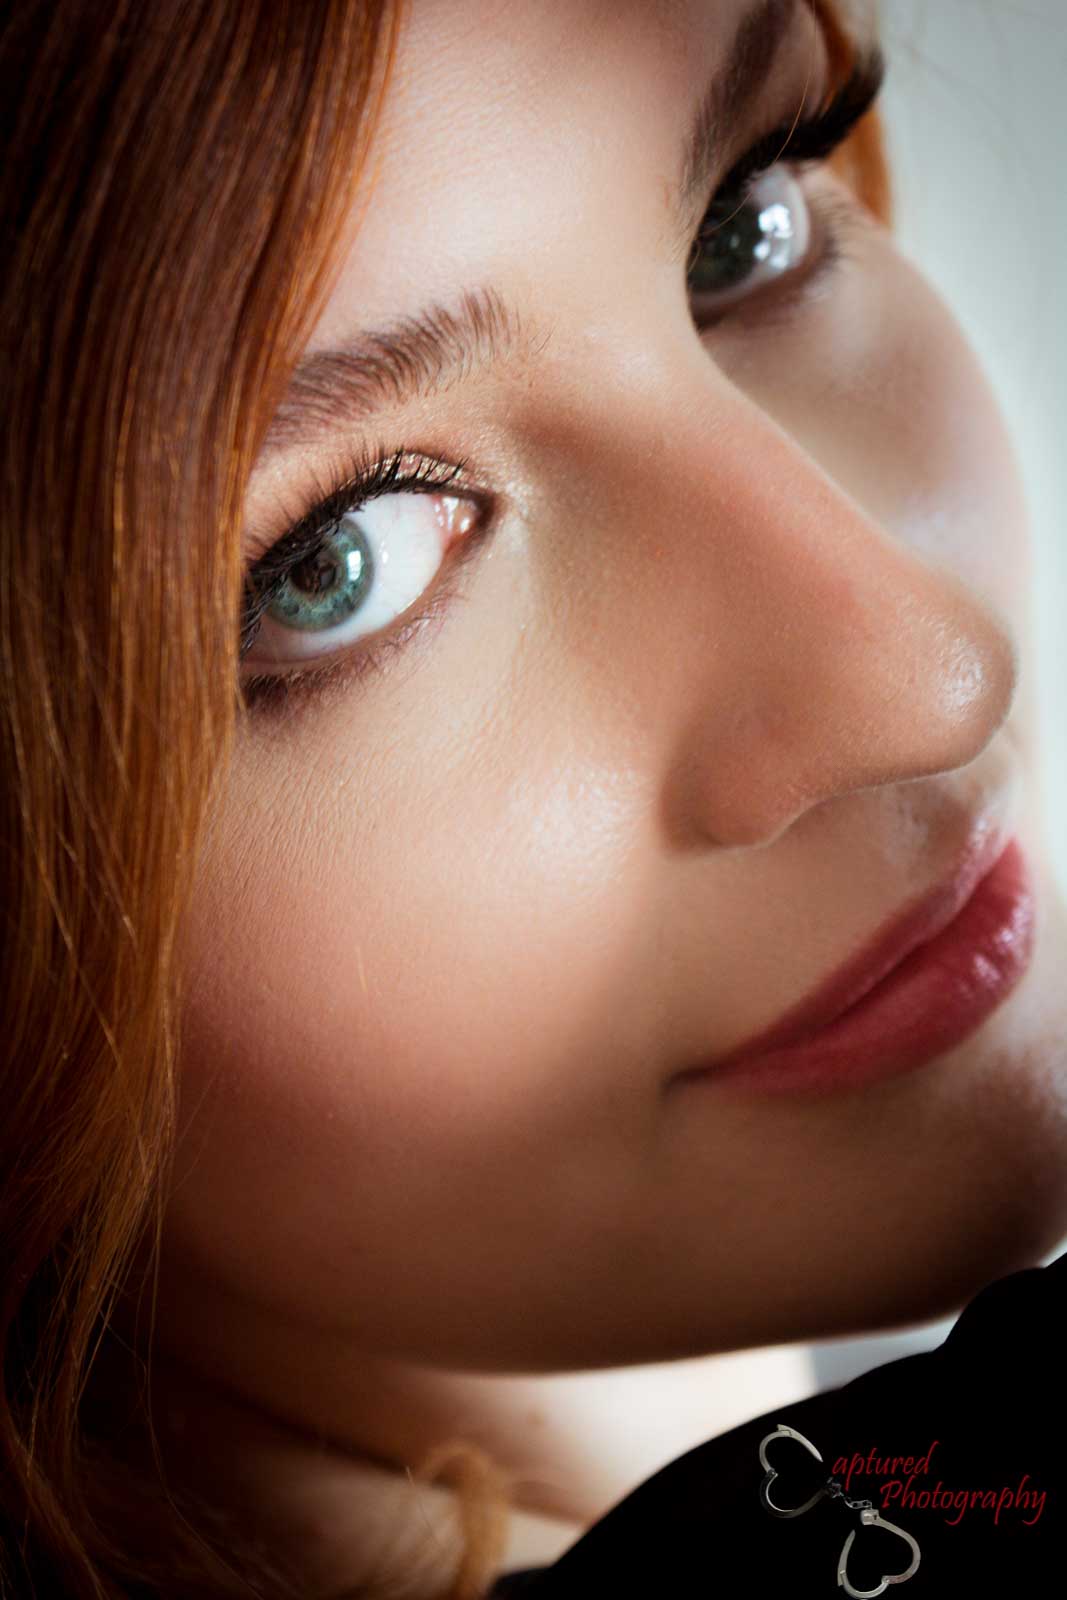
Eyes
Portrait and boudoir photographs focus on the eyes, which is why it’s important to make them pop. Use black eyeliner and mascara (instead of brown or gray) and, if you want extra drama, try fake lashes. You can make any eye size and shape look beautiful by using fake eyelashes. There are lots to choose from so make sure you pick the right type for the look you are going for.
Full sets add true drama in your image. Individual lashes give a more natural look in your image.
Tip: Always apply the eye lash glue to the back of your hand, and then run the lashes through the glue before placing on your lid. Do not squeeze the glue directly onto the lashes, because if you have too much glue, you’ll have trouble getting the lashes to lay properly.
When it comes to eye shadow, keep your eye colour in mind.
- Blue eyes tend to look better with warmer shades like champagne, golden or reddish browns and peach. Choose a warm tone to balance the cool blue.
- Hazel eyes pair well with grays; pinks and dark purples this will help bring out your eye colour.
- Brown eyes tend to be neutral, they pair well with nearly any colour. Particularly purples, bronze and navy. Since brown is neutral it will not clash with the shadow colour.
- Green eyes look great with, plum, pink and reddish browns.
Tip: I highly recommend using eye shadow primer. Just lightly apply it all over the lid and brow bone before you start applying eye shadow. It not only extends the eye shadow wearing time, but it actually makes the shadow colour look much more vibrant and intense, which is what we want in order for it to show up well your pictures. Sometimes, primer can actually make an eye shadow colour look two or three times brighter than if it was applied on a bare eyelid. Do NOT use regular primer on the eyelid; make sure you buy a primer that is specifically made to be used on eyelids to avoid skin reactions!
To add definition and depth to your eyes, use a lighter shade for the inner corner of the eye, a medium shade for the rest of the eyelid, and a darker shade for the crease.
- Sweep the middle shade all over the lid and lower brow bone.
- Dab the lighter color at the inner corner of the eye.
- Apply the darker color just in the crease between the lid and the brow bone.
This method creates depth and will make the eyes really stand out in your images.
You’ll want to use two or three coats of mascara to make sure that the eye lashes will be visible in your photos.
Blending is key. Use a brush to apply each colour and then another brush to blend the edges of each colour, you don’t want any abrupt lines.
Eyebrows
You’ll want to make sure your eyebrows are waxed or plucked a few days before the shoot so that they’re clean, defined, but not irritated.
Use eyebrow pencils to fill in your eyebrows. Make sure they are clear and dark enough when viewed in soft natural window light. Fuller brows look much better in a photo than very thin ones. Especially if you have blond or light coloured hair, eyebrows often get washed out in pictures, so darkening them up is a must.
Blush
You have the option of powder or cream products. Unless you are an expert, powder is the better choice, since it is fairly easy to blend. Once you have some experience with blending colour on your face, you can experiment with cream products. Typically, cream products are a bit longer wearing, but they take a lot of work to get the colour blended into the skin.
Try to use the best quality makeup that you can. Cheaper makeup products can look cakey on the skin or even get crease marks in them, which can make the skin appear cracked or wrinkly.
Use blush one notch darker than what looks good in person. To get the best results, make a few well-diffused applications in small quantities. The first application should be spread in a wide circle, the second and third in progressively smaller areas. This makes sure that the edges of the blush are gradual and not abrupt. You can always add more, but once you apply too much, it is tough to blur the edge or remove some.
Contouring and Highlighting
Flash photography washes out the people’s faces, which is why contouring and highlighting is extremely important for photo shoots. Use a contour with a matte finish under your cheekbones, along your temples, and under your jaw line to add definition and depth to your face. Once you’ve finished contouring, you’ll want to highlight your cheekbones and cupid’s bow in the same places the light would hit them naturally.
Lips
Lip colour should be one notch darker than what looks good in person. Lips should be taken in the direction of darker reds. Lip gloss is often used to make the lips fuller. Professional cameras and studio lights tend to soften makeup by about 50%, so it’s important to apply more colour to your cheeks and lips than what you may be used to. You’ll want to use brighter colors, especially on your lips, as natural hues and nudes are harder to capture on camera.
Hair (good for guys too)
Hairspray, gel, and other products to tame frizz and make your hair look healthy are all good suggestions. Avoid products that give a matte look. Matte finished hair will look dull and lifeless in pictures. Instead, use hair products that enhance shine. Hair shine sprays of various kinds are available.
One last check
Is everything blended? This is extremely important in photography, so make sure you haven’t missed anything before you call it good. Once you’re happy with the look, use setting spray to ensure the makeup stays intact. Of course, you will still have to touch up during the shoot — makeup melts exceptionally fast in studio settings, so be sure keep concealer, powder, and lipstick on hand, as well as skin blotters if you have oilier skin.
It may sound like a lot of work, but as soon as you have the basics down, it’s simple. Just follow these tips and tricks and voila — you’ll be camera ready in no time. But if you just don’t feel confident enough with your makeup application skills, a professional makeup artist is available for hire to do the work for you.
I’ve found this website to help. It has picture so you can follow along